For anyone who is interested in the results of my propagating 100 pachysandra cuttings from my parents’ yard into mine, this post gives an update on the health of the transplants and, at the end, shows how I did it.
 This is also a before-and-after story and an occasion for me to remark on my uneasiness with sudden and dramatic transformations, which this is not. I recognize that, as a culture, we want big and positive change: the new fabulous job that will turn those daily doldrums and interpersonal irritations into personal zest and suitable comrades; the surgery or exercise that will turn my everyday outer self into a “10” (oh, yes, I’ve had those fantasies of ten-ness); the design and construction project that will help a house be all it can be (bigger, better, beautiful). This is prevalent — just type “before and after” into the Google search box and see what you come up with.
A couple of summers ago, driving to Crane’s Beach with my friend Betsy, she asked me what I would do if I won a million dollars. I asked her permission to reframe the question, setting $50,ooo as the limit, because I couldn’t wrap my mind around so much possibility — such an immensity seemed a pressure, an obligation, a weight. She laughed; she agreed; and we played the game. On my list, I put a beautiful coat, well-made shoes, a charitable gift, and a personal chef for a year. Later, I played the game with the kids, and they put items on their lists like “couch for my room,” “video game console,” and “elevator in our house.”
As Jimmy pointed out, as the kids and I were itemizing, any one or two or three of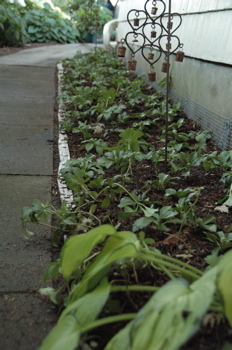 those wishes are ones we could actually afford now. He was right, and I realized — from Betsy’s laughter, from his comment — that the kind of changes that are either most interesting or tolerable to me are incremental ones. Indeed, I’ve become happier with my living room after getting a chair reupholstered from a busy, whimsical print to a green, textured chenille. Work is better on the day I tidy up my office and have a conversation with an eager student. My old clothes look snappier when I’m wearing a new sweater. This kind of change, which is probably most common in most of our lives, isn’t the stuff of dreams or the stuff that sells. Who would pay the initiation and monthly fees to a gym that promised only that working out would help you feel moderately better? Does anyone lie in bed at night fantasizing about updating the sleeve lengths on all their jackets and sweaters? More significantly, are any of such changes representable?
I confess: even though I am capable of ho-hum-to-fabulous fantasies, it’s the small changes in my life, wardrobe, house, hairstyle, garden, career, cafeteria that sustain me.
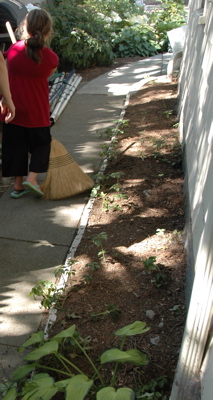
If you would like to follow how I made this incremental change in my side yard, as illustrated in the above Before and After images, please…
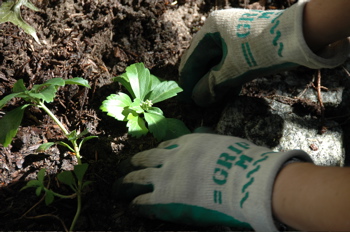
1. Gather your materials and tools
 Here again is the bag of cuttings, harvested on August 21, 2007 from
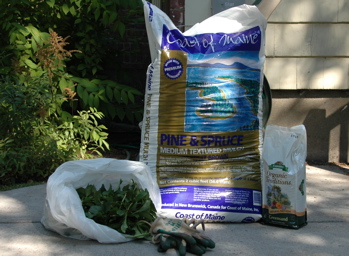
 my parents’ yard, bundled in a sealed white, unscented garbage bag with about 1/2 cup of water, and put aside for a while in a spot out of the sun. For materials, I recommend a bag of mulch and a few pounds of an organic soil enhancer like potash. Also, have ready a sharp knife, a small garden claw, water in a small pail, a stick, and some rooting powder and a paper cup to put it in.
2. Work your soil enricher into the ground.
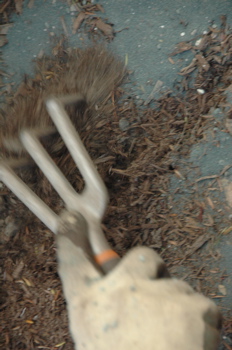 Sprinkle it liberally on the surface, and then use the claw to work it in to the top inch or so.
3. Prepare the cuttings.
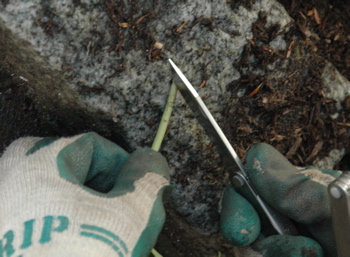
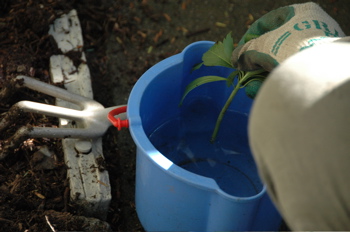
You can do this one at a time, or the whole batch at once, before planting. With the knife, slice the very end off the pachysandra stem (image “a,” below). Then, dip the stem in water (image “b”) and then dip it into a paper cup into which you’ve put about an inch of rooting powder (image “c”). Note: Because there was a delay of two weeks from the time I harvested the cuttings to the time I planted them on Labor Day, and because the stem ends had healed over in that time, I made a fresh cut in the ends. This step is probably not necessary if you are going to plant the cuttings shortly after you harvest them.
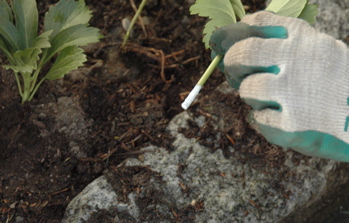
4. Insert stick into soil, and then slot in a prepared cutting alongside the stick.
5. Remove stick, press dirt around cutting, and lightly mulch  the ground around what you’ve just planted.
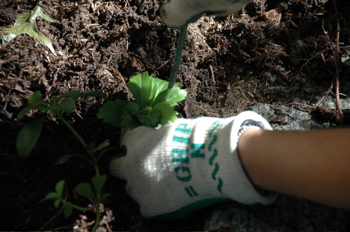
6. Repeat many times, until all cuttings are prepared, planted, and mulched.
 7. Suddenly become concerned that the lack of a root system will leave your rootless cuttings vulnerable to those damn digging squirrels, and improvise a squirrel deterrent device. (Because I had them around, I tried bells on a low-to-the-ground metal hook. Try windchimes. Try a scarecrow.) Think wishfully.
8. Water your newly planted patch for a few minutes. Do this twice a day, every day.
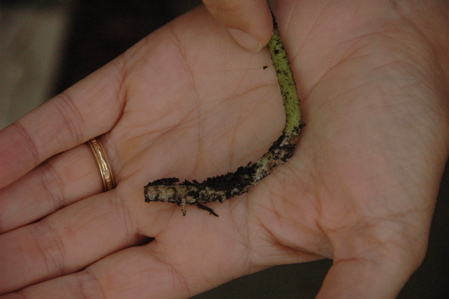
9. Three weeks later, because you’ve watered and waited long enough and can’t suppress your curiosity any longer, dig up one of the cuttings, and see that… yes! it worked! They are sending out roots. Feel rewarded. Be content.
—–
All images for this post are credited to staff photographer, Eli Guterman.

I know what you mean about incremental changes. A whole new outfit can be scary, but a cute new top with my favorite skirt is awesome. And while this isn’t an incremental change, I was just thinking today about how fabulous a mood I’m always in after going to the farmer’s market and putting all those pretty vegetables in the basket at home. I’ll be sad when there are no more tomatoes!
It seems fairly usual for people who win the lottery to sort of crash and burn, and end up with no more money than they had before.
Every time I have a fantasy of buying something really expensive and fabulous — like, in my case it might be a Jaguar — I then think, oh come on that would be so ostentatious, I couldn’t actually drive around in that thing . . .
Pingback: - Signs of progress « Leaf - Stitch - Word
Pingback: Last-ditch attempt to solve the unsolveable | leaf – stitch – word
I love the fact that you went straight into the border without rooting the cuttings first in a separate container with plastic cover in eastern light. So here’s my question: Did they continue to flourish? Second question: How long did you keep up the twice-a-day watering?
I did the twice-a-day watering for about 2 weeks, if I recall. I don’t think I knew the right answer, so I treated these as though they were grass seed, which needs two weeks of moisture to germinate.